
Seed to harvest, step by step

Follow it in order. Each stage lists what to do and the environment targets to hold.

Legal notice: We do not promote or encourage breaking the law. This site is for adults 21+ growing in states and jurisdictions that have legalized cannabis cultivation, and who are following all legal growing guidelines, plant count limits, and permit requirements that apply to them.
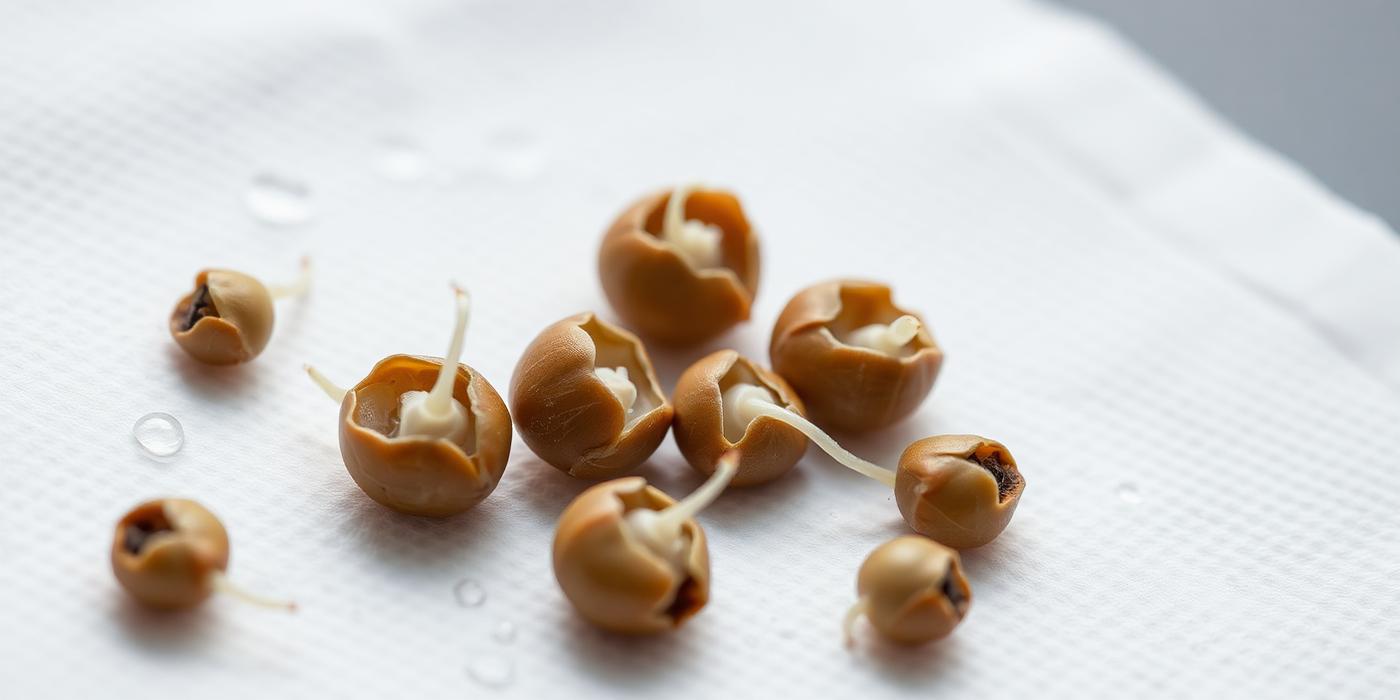
Cannabis seeds sprouting a white taproot on a damp paper towel

The 15-hour soak method

Soak your seeds in room-temperature water for about 15 hours in the dark to soften the shell and signal the embryo to wake up. Then move them into a damp paper towel in the dark for a few days until the white taproot appears — that's when they go in the soil, taproot down.

1. Germination

2-5 days

Wake the seed up with a dark soak, then sprout it in a damp paper towel in the dark before it ever touches soil.

Water temp 65-72°FSoak ~15 hoursSprout at 70-80°FPlant at 1/4" taproot
  1. 1

    Soak your seeds in a cup of room-temperature (65-72°F) water for about 15 hours. Keep the cup in a dark, warm spot. Most seeds sink within the first several hours — that's a good sign, but floaters can still pop.

  2. 2

    Do not soak much past ~20 hours. Over-soaking drowns the seed and stalls the taproot.

  3. 3

    Dampen two paper towels so they are moist but not dripping. Lay the seeds out with space between them, cover with the second towel, and place the towels between two plates or inside a zip bag left slightly open for air.

  4. 4

    Keep the cup or bag in a dark spot at 70-80°F. Darkness tells the seed it's underground and encourages the taproot to search. Check once a day and re-mist so the towels never dry out.

  5. 5

    In 1-4 days you'll see a white taproot. Once it's about 1/4 inch long, it's ready to plant.

  6. 6

    Plant taproot-DOWN, about 1/2 inch deep in pre-moistened soil or a starter plug. Cover lightly — never pack it down. Handle only by the shell, never the taproot.

  7. 7

    Mist the surface and keep a humidity dome on for the first few days. The seedling should break the surface in 1-3 days.

2. Seedling

1-3 weeks

Tiny roots, big humidity. Go easy on light, water, and nutrients.

18/6 light65-70% RH72-78°FNo/low nutrients
  1. 1

    Run 18 hours of light, 6 off, with your LED dimmed and hung high (roughly 24-30 inches).

  2. 2

    Keep humidity at 65-70% and temps at 72-78°F.

  3. 3

    Water in a small ring around the stem — a shot glass worth every day or two. Overwatering is the #1 seedling killer.

  4. 4

    No added nutrients yet if you're in living or lightly amended soil; the seed and soil carry it for the first 2-3 weeks.

  5. 5

    Once the plant has 3-4 sets of serrated leaves, it's moving into veg.

3. Vegetative Growth

3-8 weeks

Build the frame. This is where size, structure, and root mass are won.

18/6 light55-65% RH72-82°FN-heavy feeding
  1. 1

    Stay on 18/6 (or 20/4) light. Lower the LED and raise intensity gradually.

  2. 2

    Transplant into 3-5 gallon breathable fabric pots once roots fill the starter container.

  3. 3

    Feed a grow-dominant (high nitrogen) fertilizer at 1/4 to 1/2 strength and work up. Watch the leaf tips for burn.

  4. 4

    Water when the top inch of soil is dry and the pot feels light. Water until you get 10-20% runoff.

  5. 5

    Top the plant above the 4th or 5th node, then use LST — gently tying branches outward — to build a flat, even canopy.

  6. 6

    Keep a steady breeze over the canopy with an oscillating fan to strengthen stems and stop mold.

4. Flowering

8-11 weeks

Flip the lights, drop the humidity, and switch to bloom nutrients.

12/12 light40-55% RH68-80°FP-K heavy feeding
  1. 1

    Switch photoperiod plants to 12 hours on / 12 hours off with a light timer. Autoflowers stay on their veg schedule.

  2. 2

    Guarantee total darkness during lights-off — light leaks cause stress and hermies.

  3. 3

    Drop humidity: 50-55% early flower, 40-45% late flower. This is where the dehumidifier and carbon filter earn their keep.

  4. 4

    Move to bloom nutrients (lower N, higher P and K). Expect a 'stretch' of 1.5-2x height in the first 2-3 weeks.

  5. 5

    Defoliate lightly around week 3 and again around week 6 to open up airflow and light penetration to bud sites.

  6. 6

    Flush with plain pH'd water for the last 1-2 weeks if you're running synthetic nutrients.

5. Harvest

1 day

Trichomes, not calendars, tell you when it's ready.

70-90% cloudy trichomes10-20% amberPistils darkened24-48h dark before chop
  1. 1

    Get a 60-100x jeweler's loupe or a USB microscope and look at the trichomes on the buds (not the sugar leaves).

  2. 2

    Clear trichomes = too early. Cloudy/milky = peak THC, more heady. Amber = more sedative.

  3. 3

    Most growers cut at roughly 70-90% cloudy with 10-20% amber.

  4. 4

    Other supporting signs: 70-80% of pistils darkened and curled in, buds swollen, and fan leaves starting to yellow.

  5. 5

    Give the plant 24-48 hours of darkness before chopping, and harvest right at the start of the lights-off period.

  6. 6

    Cut into manageable branches and wet-trim the big fan leaves.

6. Dry & Cure

2-6 weeks

You can ruin great weed in the last two weeks. Slow is the whole trick.

60°F / 60% RH dry7-14 day dry62% RH cureBurp daily week 1
  1. 1

    Hang branches in a dark room at 60°F and 60% RH with gentle indirect airflow — never a fan blowing straight on the buds.

  2. 2

    Dry for 7-14 days. Buds are ready when small stems snap instead of bending.

  3. 3

    Trim the buds off and jar them at about 62% RH, filling jars roughly 3/4 full.

  4. 4

    Burp the jars 10-15 minutes once or twice a day for the first week, then once every few days.

  5. 5

    Cure at least 2 weeks; 4-8 weeks is noticeably better for smell and smoothness.